DIY Pinecone Flowers: A Guide to Creating Lasting PInecone Blooms
Wish you could have a beautiful floral arrangement that lasts forever? This guide will show you how to transform simple pinecones into stunning, year-round flowers. Learn how the natural shape of a pinecone can be crafted into a rustic yet elegant bloom, perfect for adding a touch of nature to your home without the hassle of watering.
9/5/20256 min read
Let’s be honest, who doesn’t love a beautiful floral arrangement? They can brighten up a room, add a pop of color, and just generally make a space feel more alive. But what if you could have all that without the hassle of watering, wilting petals, or replacing a new bouquet every week? You know what I’m talking about—those stunning arrangements that last forever. Well, grab a few pinecones, and I'll show you how to do just that.
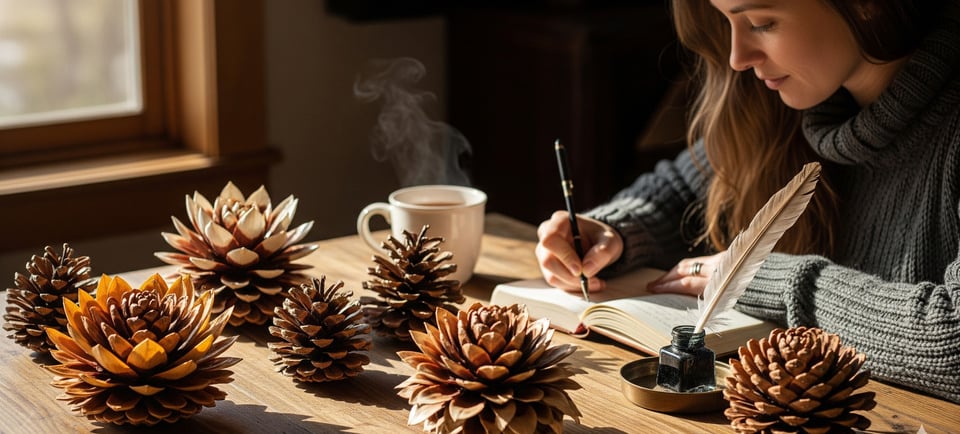
This isn't just about a simple craft project; it's about making something truly special, something that captures the rustic charm of nature and the timeless beauty of a flower. These DIY pinecone flowers aren't just for a specific season, either. They're a versatile decor piece you can use all year round, whether you want a cozy, autumnal vibe or a vibrant, spring-like feel. Honestly, the possibilities are endless.
You might be thinking, "A pinecone... a flower? How does that even work?" It's a fair question. The genius of this project lies in how the natural structure of a pinecone, with its layered scales, perfectly mimics the intricate petals of a zinnia, a sunflower, or a classic rose. Once you see it, you'll never look at a fallen pinecone the same way again. It's truly one of those "aha!" moments in crafting.


Getting Your Hands Dirty (The Good Kind)
Before we start, let's talk about the materials. The beautiful thing about this project is that you probably have most of what you need lying around. No fancy art supplies or a trip to a specialty store required. We're keeping it simple and straightforward.
What You'll Need to Gather:
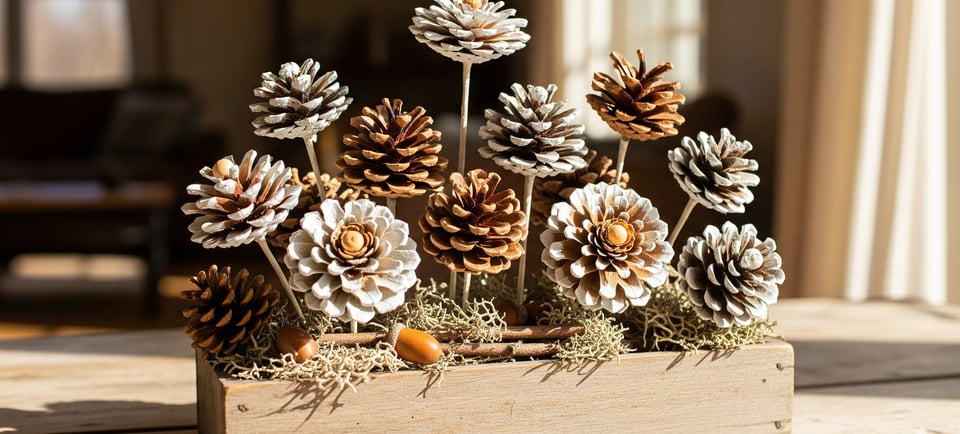
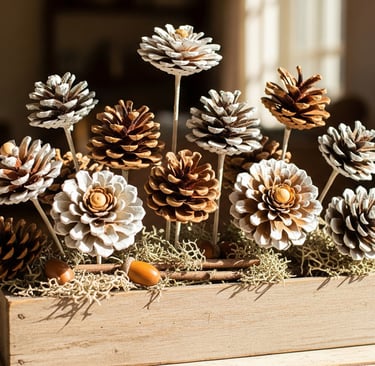
Pinecones: The main event! Any size will do, but larger ones tend to look more like bold, open flowers. If you're using pinecones you've foraged yourself, there's a quick and important prep step. You'll want to bake them at around 250°F for about 30-60 minutes on a baking sheet to get rid of any little critters or debris. This also helps them open up fully, giving you the best 'petals' to work with.
Wooden Skewers: These will be the "stems" for your flowers. Long, sturdy skewers work best, but you can also use thin wooden dowels or even floral wire for a different look.
Hot Glue Gun & Glue Sticks: The trusty glue gun is our best friend here. It's fast, strong, and ensures your pinecone stays securely on its stem.
Drill with a 3/16-inch bit (or a Phillips head screwdriver): This is for making the pilot hole. A drill makes the job super quick, but you can certainly get the job done with a sturdy screwdriver if you’re patient.
Vase & Floral Foam (Optional but Recommended): A vase about 6 inches tall works well. The floral foam inside helps hold the heavier pinecone flowers upright and in place.
Paint: Acrylic paint is perfect for this. You can get a variety of colors, or just a few. We’ll be painting just the tips to create a truly realistic floral effect.
Other Decorative Bits (Optional): Think glitter, faux leaves, or even little beads for the center of your flowers. Let your imagination run wild!


From Pinecone to Petal: A Step-by-Step Tutorial
Alright, are you ready? Let's get to the fun part. The process is pretty forgiving, so don't worry about being perfect. The slight imperfections are what give them that wonderfully human, handmade feel.
Step 1: Prep Your Pinecones.
Assuming you’ve already baked them to perfection, let them cool for a few hours. This makes them easier to handle and ensures the hot glue will stick properly.
Step 2: Drill the Hole.
This is a critical step, but it's not hard. With your drill or screwdriver, carefully create a small hole at the very base of the pinecone. It only needs to be about an eighth of an inch deep, just enough to give the skewer a starting point. This prevents the pinecone from splitting and gives you a solid anchor for the stem.
Step 3: Add Some Color.
Now for the artistic bit! Using a small paintbrush, apply your chosen acrylic paint to the tips of the pinecone scales. I love the look of painting just the ends because it still lets the natural, rustic texture of the pinecone peek through. It gives the flowers a two-toned, natural feel. Go for vibrant pinks and purples to mimic classic pinecone roses, or cheerful yellows and oranges for a burst of sunshine. Let the paint dry completely before moving on.
Step 4: Attach the Stem.
This is where the magic really happens. Put a generous glob of hot glue into the hole you drilled. Immediately take a wooden skewer and insert the flat end into the hole. Press it in firmly and hold it for about 20 seconds. It’s important to give the glue time to set and create a strong bond, as this is what holds the entire flower together. Once it's dry, give it a gentle tug to make sure it's secure.
Step 5: Assemble Your Pinecone Bouquet.
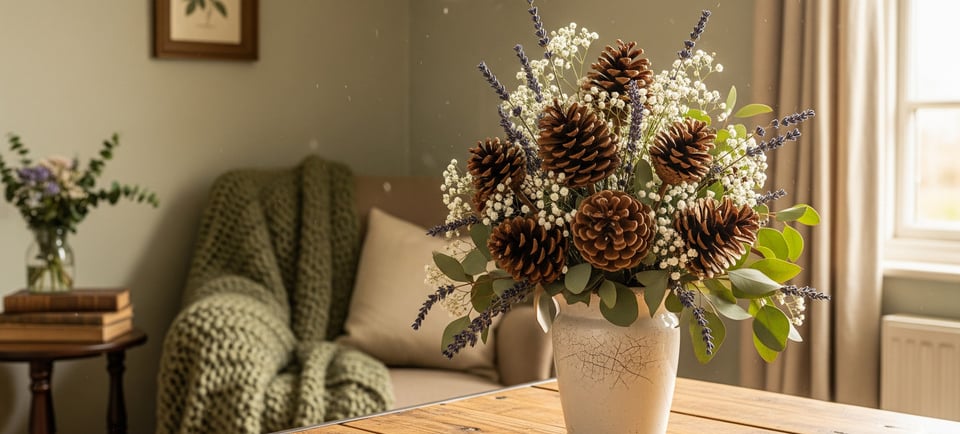
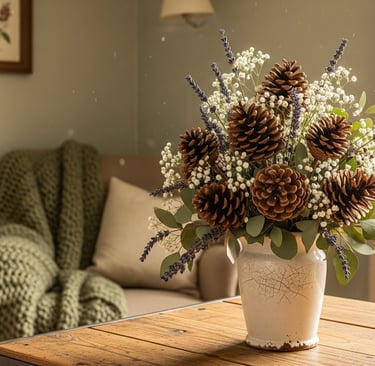
This is where you become a florist! Grab your vase and floral foam. Trim the foam to fit snugly inside the vase to prevent your beautiful creations from toppling over. Start with a full-length pinecone stem in the center, then trim the other skewers to varying lengths. This creates a more natural, cascading pinecone bouquet. A little tip from experience: play around with the lengths before you start trimming to get the perfect shape. You can also add some filler, like faux white berries or leafy branches, to fill in the gaps and make the arrangement look even fuller.

FAQs on DIY Pinecone Flowers
Q: Can I use wire instead of wooden skewers for the stems?
A: Absolutely! Floral wire is a great alternative. It's more flexible, which lets you bend and shape the stems for a more dynamic arrangement. You can use hot glue to secure the pinecone, or for a more classic look, thread the wire through the base of the pinecone scales and twist it tightly around the stem to hold it in place.
Q: What if I don't have a drill?
A: No worries! While a drill makes it easier, a simple Phillips head screwdriver works just fine. You just have to be a little more patient and apply steady, consistent pressure to bore a shallow hole into the bottom of the pinecone. Another alternative is to use floral clippers or strong scissors to cut the pinecone horizontally and use that flat piece as your base.
Q: What's the best way to clean foraged pinecones?
A: The most common and effective method is to bake them. It not only kills any bugs but also helps them open up and release any sap. Simply place them on a foil-lined baking sheet and bake at a low temperature (around 200-250°F) for about 30 minutes to an hour. You'll know they're ready when they've fully opened and look dry.
DIY Pinecone Flowers: More Than Just a Craft
There’s something truly special about a rustic decor piece that you’ve made yourself. This project is a chance to slow down, connect with nature, and create something beautiful with your own two hands. It's a simple pleasure that feels surprisingly satisfying. Think about how much you'd pay for a beautiful bouquet, and then consider how little this costs. It's not just a budget-friendly alternative; it's a testament to the idea that some of the most beautiful things in life are found right in our own backyards.
These flowers also make for incredibly thoughtful gifts. Imagine giving a friend or loved one a stunning, handmade pinecone floral arrangement that will never wilt. It’s a gift that says, "I took the time to make this just for you," and honestly, that's a feeling you can't buy.
So, the next time you're on a walk, keep an eye out for those beautiful pinecones. They're not just pinecones; they're the start of something truly magical.