A Foolproof Guide to Making Royal Icing Flowers
Have you ever wondered how bakers create those intricate, beautiful flowers on cakes and cookies? These delicate royal icing flowers are surprisingly simple to make, requiring just a few basic tools and a bit of patience. This guide will show you that you don't need to be a professional to create stunning, edible art that's as unique and beautiful as a real blossom.
9/4/20255 min read
Have you ever looked at a beautifully decorated cake or a batch of cookies and wondered, "How on earth do they make those stunning, delicate flowers?" Honestly, it can seem a little intimidating, like something only a professional baker or an artist could ever pull off. But here's the thing, it's totally within your reach! We're talking about royal icing flowers—those sweet, elegant little decorations that look so intricate but are, surprisingly, more forgiving than you might think. Just like in nature, no two blossoms are exactly the same, and that's what makes them so special.
Let's be real, you don't need a professional studio or a degree in pastry arts to make these. You just need a little patience, a few basic tools, and the right consistency. Think of it less as a strict recipe and more like a fun, creative project. I mean, who doesn't love a project that ends with edible art?

The Sweet Foundation: Getting That Royal Icing Consistency Just Right
Before you can even begin piping your first petal, you need to master the star of the show: the royal icing itself. A lot of people get hung up on this part, but it's really the secret to success. You're looking for a specific consistency, something stiff enough to hold its shape as you pipe it, but not so thick that it's a workout for your hands.
Typically, you'll find a few different types of royal icing used in decorating, but for piping flowers, a stiff consistency is your best friend. It’s the kind that holds a firm peak when you lift your spatula. If it’s too runny, your beautiful petals will melt into a sad puddle. If it’s too stiff, it'll be a bumpy mess. A little tip? Start with it a bit on the stiffer side, and then add water, literally a drop at a time, until it's just right. It's always easier to add a little water than to try and thicken it up with more powdered sugar.
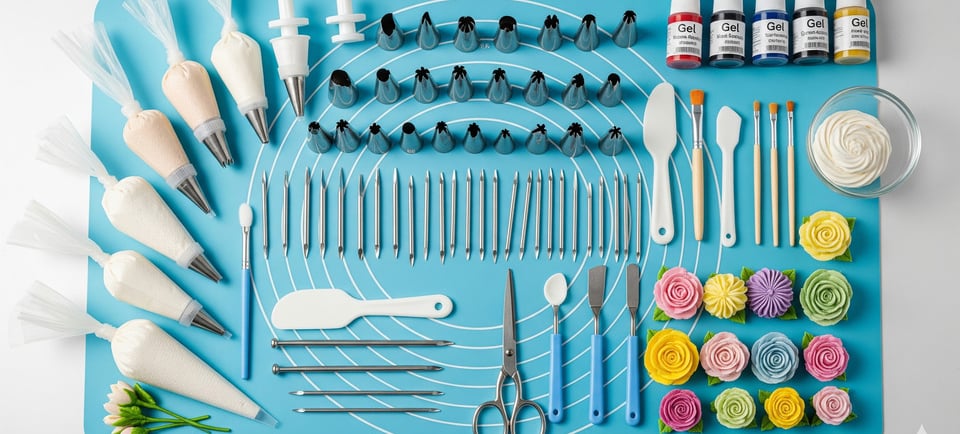
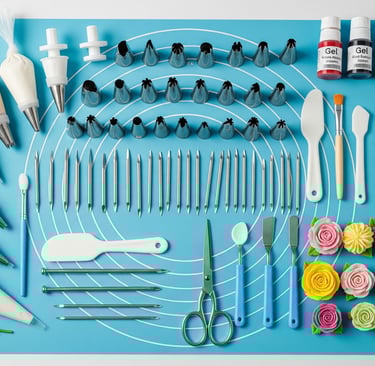
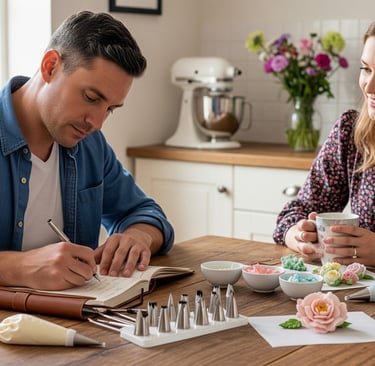
Your Royal Icing Flower Toolkit: What You'll Need to Get Started
Okay, so you’ve got your perfect royal icing. What's next? Gather your supplies! Think of it like a gardener prepping their tools before tending to their flowerbeds.
Piping Bags & Tips: These are your creative conduits. For flowers, you'll want some specific petal piping tips, like a Wilton #101 or #104. These are shaped like a teardrop—wide at one end, narrow at the other—which is what gives you those realistic-looking, delicate petals. Having a few different sizes is a great idea to vary your blooms.
A Flower Nail: This nifty little gadget is a flat-topped nail on a stem. It lets you turn your creation as you pipe, ensuring a perfect, symmetrical design. A simple dot of icing on the head of the nail will hold your parchment paper square in place.
Parchment Paper Squares: You'll pipe your flowers directly onto these. Once they’re dry, the flowers will peel right off, no muss, no fuss.
Gel Food Coloring: Forget the liquid stuff. Gel colors give you vibrant, rich hues without adding extra moisture to your icing. This is crucial for maintaining that perfect consistency.
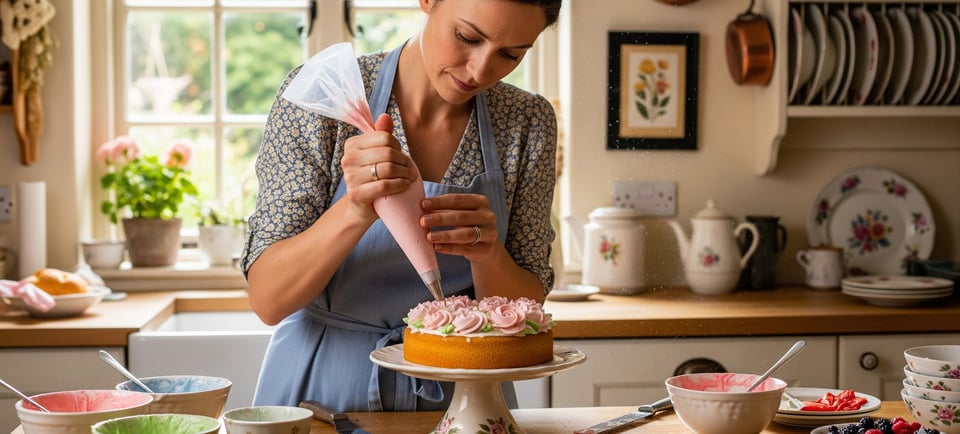
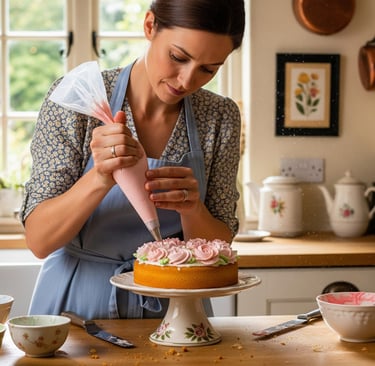
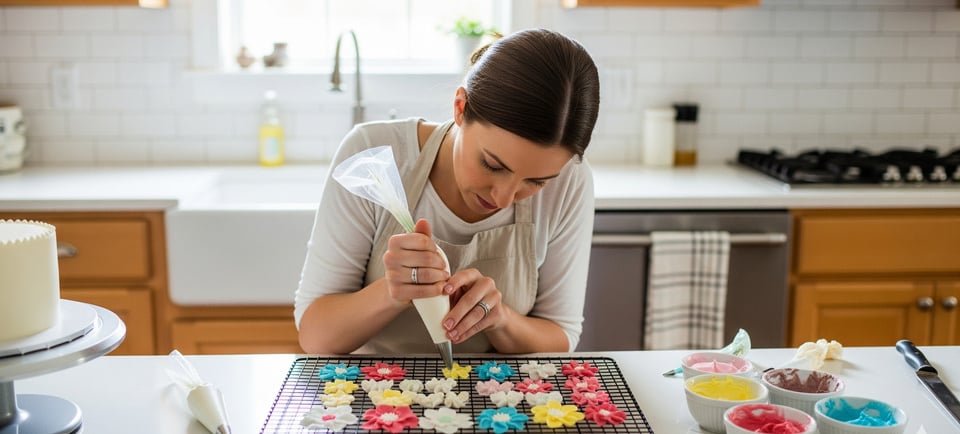
The Art of the Petal: Piping Your First Icing Flower
This is where the magic really happens. With your parchment paper square secured on your flower nail, you're ready to create. Start by piping a small base, like a little cone or spiral, on the nail. This will be the center of your flower.
Here’s a little secret: when piping petals, the key is pressure and movement. Hold your piping bag with the wide end of the tip facing the center of your flower. Squeeze gently to start the petal, then release pressure as you pull away, creating a thin, pointed end. For a rose, you'll layer these petals, slowly building a beautiful, multi-layered bloom. It’s a rhythmic process—squeeze, pull, turn the nail, repeat. You'll get the hang of it, honestly.
Don't fret if your first few aren't perfect. My first attempts at roses looked more like lumpy cabbages, and that’s perfectly normal! The beauty of these edible flowers is that they're all unique. A slightly ruffled petal or an uneven edge just adds to the charm, making them look even more like the real thing.


Patience is a Virtue: The Drying Game
Once you’ve piped your stunning royal icing flowers, you must let them dry. This isn't a race; it's a waiting game. Depending on the size of your flowers and the humidity in the air, this can take anywhere from 8 to 24 hours. They need to be completely hardened before you can handle them. A good way to speed things up? Place them in a dry, low-humidity area, or even in front of a fan on a low setting.
Once they're dry, they're surprisingly sturdy. They’ll peel right off the parchment paper, ready to be placed on a cake or cookie. It's such a satisfying feeling, isn't it?
FAQs on Making Royal Icing Flowers
Q: How long can I store my royal icing flowers?
A: Once completely dry, you can store your royal icing decorations for up to two weeks! The key is to keep them in an airtight container, away from moisture and direct sunlight. You can layer them with parchment paper in between to prevent breakage.
Q: Can I use royal icing on a buttercream-frosted cake?
A: You absolutely can! Just be mindful that royal icing can absorb moisture from the buttercream, which can cause the colors to bleed or the flowers to soften over time. It’s best to place the flowers on the cake closer to the time of serving.
Q: What if I make a mistake while piping?
A: No big deal! That's the beauty of it. As long as your icing is still wet, you can scrape it up with a small spatula or knife and start over. And once it's dry, a little imperfection just makes it look more natural.
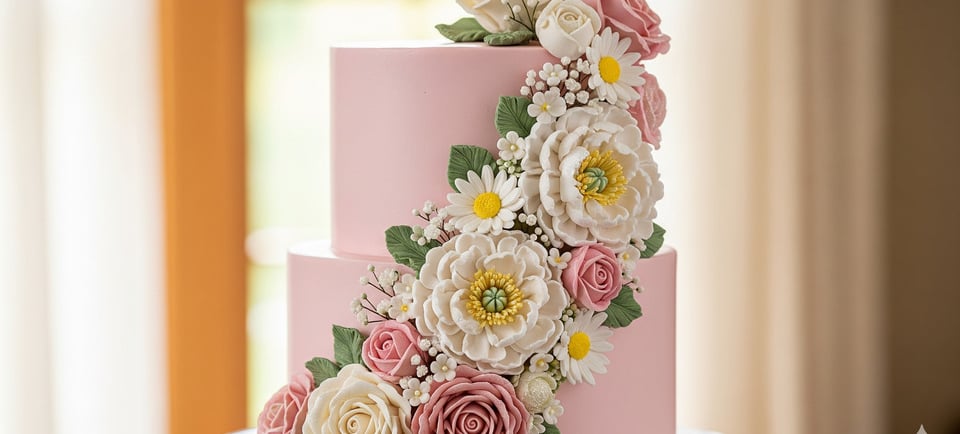
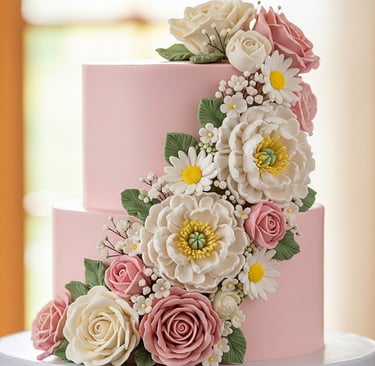
Royal Icing Flowers: The Final Flourish
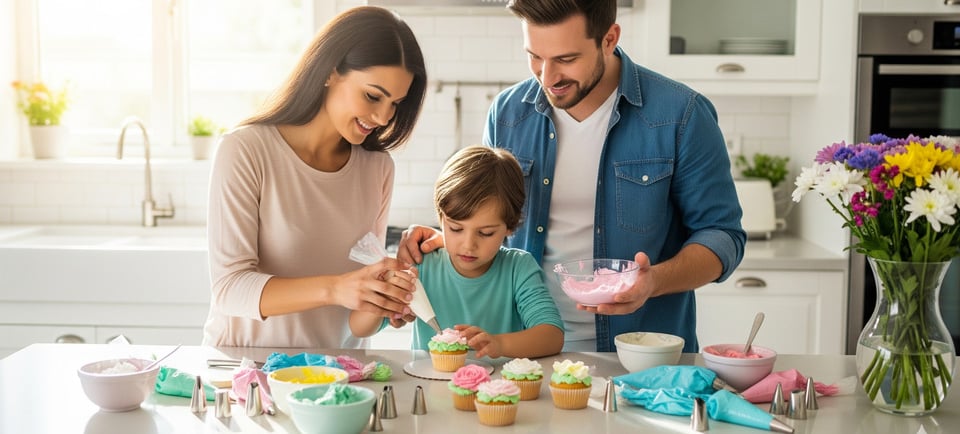
When your flowers are ready, you can use a tiny dot of fresh buttercream or royal icing to adhere them to your cakes, cupcakes, or cookies. Imagine a stunning cascade of royal icing roses on a wedding cake or a delicate spray of blossoms on a birthday cake. These little additions can completely transform a simple baked good into a work of art.
So, are you ready to give it a try? Trust me, the learning process is half the fun. You'll pipe, you’ll get frustrated, you'll accidentally get icing all over your hands, but then, you'll create something beautiful and you'll be so proud. Happy decorating!